How to Layout a Stair Stringer: A Step-by-Step Guide
A solid stairway begins with precise planning, and at the heart of that process is the stair stringer layout. The stringer acts as the backbone of your staircase, supporting each step and ensuring structural stability. Whether you’re building a new deck or updating an interior stairway, understanding how to measure, mark, and cut your stair stringer is a crucial skill. In this guide, we’ll walk through everything you need to know to get the layout right the first time.
What Is a Stair Stringer?
A stair stringer is the inclined board that supports the treads (the part you step on) and risers (the vertical part between steps). Typically cut from 2×12 lumber, stringers serve both structural and aesthetic purposes. They provide the necessary support to carry weight safely and also define the overall angle and appearance of the staircase. Without an accurately laid-out stringer, your stairs could feel uneven, unsafe, or simply awkward to use.
Why Proper Layout Matters
Precision in stair stringer layout isn’t just about neat carpentry—it’s about safety and comfort. Poorly measured stairs can result in inconsistent rise and run, which feels awkward to climb and may even violate building codes. A miscalculated stringer could cause the staircase to sag, creak, or fail over time. By carefully planning the layout, you not only ensure compliance with building regulations but also create a staircase that feels natural and secure underfoot.
Tools and Materials You’ll Need
Before starting your layout, gather the essential tools and supplies to avoid interruptions:
– Framing square with stair gauges for precise marking
– Measuring tape to calculate overall rise and run
– Pencil or chalk line for clear, visible marks
– Circular saw and handsaw for clean cuts
– 2×12 lumber (commonly used for stringers)
– Level and clamps to ensure accuracy during setup
Having the right equipment not only saves time but also reduces mistakes during cutting.
Step-by-Step Guide on Stair Stringer Layout
Step 1: Measure the Total Rise and Run
The first step in stair stringer layout is determining the total rise (the vertical height from the finished ground to the finished deck or floor) and the total run (the horizontal length the staircase will cover). Divide the total rise by your desired riser height—usually between 7 and 7 ¾ inches—to determine how many steps you’ll need. Next, multiply the number of steps by your tread depth, typically 10 to 11 inches, to calculate the total run.
Getting these measurements correct is critical, as they set the foundation for a balanced and code-compliant staircase.
Step 2: Mark the Stringer with a Framing Square
With your rise and run calculated, it’s time to transfer those measurements onto the stringer board. Secure stair gauges onto your framing square at the rise and run dimensions. Position the square on the edge of the 2×12 lumber and mark your first step. Then slide the square along the board, repeating the marks until the full set of stairs is outlined.
This process ensures each tread and riser is identical, giving your staircase a smooth, uniform rhythm. Be mindful of the bottom and top cuts—the base of the stringer will sit flat on the landing, while the top must be adjusted to fit flush against the deck or floor framing.
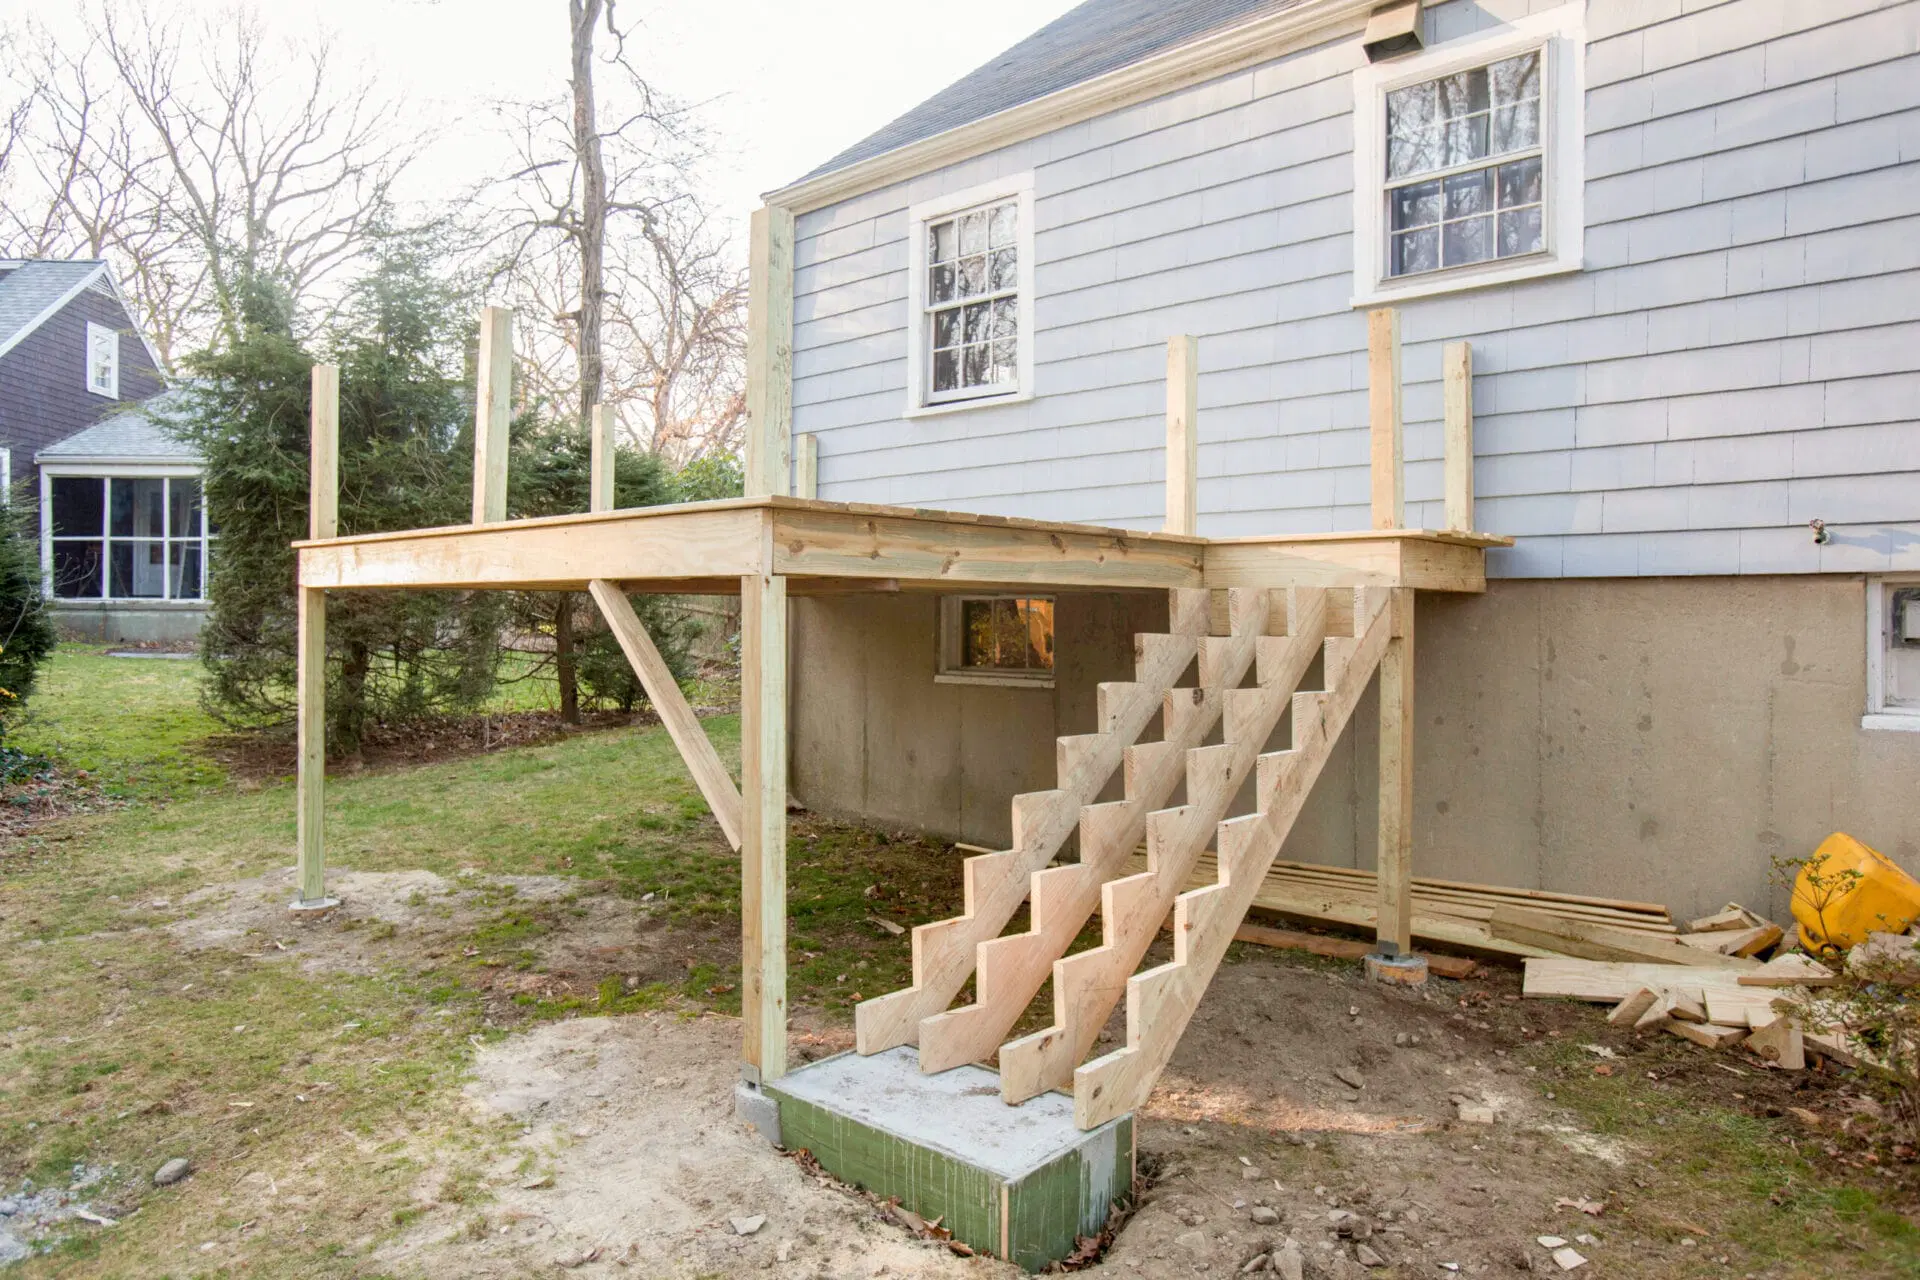
Step 3: Cutting the Stringer
Cutting must be done with precision to avoid weakening the board. Use a circular saw to cut along the marked lines, stopping short at the corners to prevent overcutting. Finish the cuts with a handsaw for accuracy. Once the first stringer is cut, use it as a template to trace additional stringers. Most staircases require at least three stringers for stability, though wider stairs may need more.
After cutting, check the fit by positioning the stringer in place. Make sure it sits level on the landing and attaches securely to the upper framing. Any gaps or uneven cuts should be corrected before proceeding.
Step 4: Check for Accuracy and Fit
Before installation, double-check your stair stringer layout. Place the stringer temporarily in position to confirm the rise and run feel comfortable. Use a level to ensure the stringer sits properly against the framing. Adjustments at this stage are far easier than after installation.
It’s also a good idea to dry-fit the treads and risers onto the stringer. This allows you to visualize the finished staircase and confirm that your layout matches the design.
Frequent Errors and How to Prevent Them
Many DIY builders make avoidable errors during stair stringer layout. Rushing measurements, skipping code checks, or cutting too deeply into the lumber can all compromise the final result. Another frequent mistake is failing to account for tread thickness, which can alter riser heights and throw off the rhythm of the stairs.
Always take time to measure twice before cutting, and remember that precision in layout pays off in long-term safety and durability.
Conclusion
Learning how to layout a stair stringer is a foundational skill for anyone tackling stair construction. With careful measurements, the right tools, and patience during cutting, you can create a strong, safe, and visually appealing staircase. Remember, the stringer forms the backbone of your stairs—get it right, and the rest of the project will fall into place.
Trending Reading

Can You Drive A Screw Into Siding? Everything You Need to Know
If you’ve ever considered hanging a decoration, in...

How to Measure Fence Post Spacing: A Complete Guide
When planning a new fence, one of the most importa...
How to Build a Wood Deck Railing: A Step-by-Step Guide
A wood deck railing is more than just a safet...

How to Build a Floating Deck: A Step-by-Step Beginner’s Guide
When it comes to creating a beautiful outdoor spac...

What Cleans Composite Decking Best?
Composite decking are getting popular in outdoor p...

How to Keep Bugs Away from Your Patio
There’s nothing better than spending a sunny after...

How to Replace Deck Boards
Why do you need to replace your deck boards Deck b...

How to Build An Outdoor Wood Stair Railing
Outdoor wood stair railing is not only a functiona...
Winter Care Guide for Outdoor Decking: Simple Steps to Keep It in Top Shape
As autumn fades and winter sets in, we bundle up f...

How to Build a Hot Tub on Your Deck
Adding a hot tub on a deck is a great way to beaut...
Trending Reading

What Are the Differences Between the WPC Board and PVC Board?


[2025 Update] How Long Does WPC Decking Last?


