
Deck Inspection Made Easy: Why It Matters and What to Look for
Your deck is more than just an outdoor platform—it’s an extension of your home, a place for weekend barbecues, family gatherings, and quiet evenings. But over time, weather and wear can take a toll. Boards loosen, wood can rot, and even composite materials can warp or shift. Left unchecked, small problems can turn into safety hazards or costly repairs.
That’s why regular deck inspections matter. In this blog, we’ll walk you through what to check, the tools you’ll need, and how to catch issues early—before they become major headaches. Let’s dive in.
The Importance of Deck Inspection
Decks face the elements 365 days a year. Over time, this exposure can cause fasteners to loosen, wood to rot, and composite boards to warp. A sudden deck failure isn’t just expensive to fix—it can be dangerous. Regular deck inspections help you spot small issues before they become big problems, saving you money and worry.
Deck Inspection Tools (Must-Have & Optional)
Must-Have Tools
Tape Measure: Check joist spacing, board gaps, and deck height above the ground.
Level: Confirm the deck surface slopes correctly (about 1–2% away from the house) and stays flat underfoot.
Screwdrivers or Drill: Tighten or remove screws and bolts.
Wrench Set: Secure nuts and bolts on framing hardware.
Flashlight or Headlamp: Illuminate tight or dark spaces under the deck.
Optional Tools
Moisture Meter: Measure wood moisture content; values above 20% suggest rot risk.
Stud/Metal Detector: Locate hidden fasteners or framing without pulling boards.
Infrared Camera: Quickly spot cool (wet) or hot (dry) areas indicating leaks or insulation gaps.
What Should You Inspect?
Footings and Posts
Concrete Footings: Look for cracks wider than 3 mm or signs of settlement. Small hairline cracks are often harmless, but larger ones should be evaluated.
Post Bases and Caps: Metal connectors that anchor posts to footings must be tight and rust‑free. Replace any corroded hardware with stainless steel or galvanized steel.
Post-to-Ground Clearance: Wood posts should sit on metal bases or concrete piers—never directly in soil. Direct contact invites rot.
Vertical Alignment: Use a level to check that posts are plumb. If a post leans more than 5 mm off vertical, it can put extra stress on the entire structure.
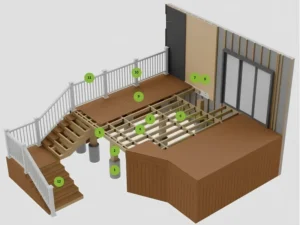
Joists and Framing
Rot and Decay: Shine your light up into the framing cavity. If wood feels spongy or has dark discoloration, it may be rotting. Probe suspect spots gently with a screwdriver.
Joist Span and Spacing: Standard joist spacing is 16 inches (about 40 cm) on center for wood decks. Wider spacing can make boards feel “springy” and reduce load capacity.
Fasteners and Hangers: Check joist hangers, nails, and screws. Hangers should be fully nailed per the manufacturer’s instructions. Replace any missing or bent nails with structural‑grade screws.
Sagging or Bounce: Walk around the deck. If you feel excessive bounce or hear creaks underfoot, the framing may be undersized or failing.
Flashing and Water Management
House-to-Deck Flashing: Where your deck meets the house, there should be a metal flashing strip tucked behind siding. This prevents water from seeping into the house. Look for gaps, rust, or warped flashing.
Board End Gaps: Deck boards expand and contract. Proper gaps (usually 1/8 in. to 3/16 in.) let water drain and dry. Gaps that grow too large can indicate fastener pull‑through or board warping.
Slope for Drainage: The deck surface should slope slightly—roughly 1/8 in. per foot—away from the house. Standing water can rot framing over time.
Gutter and Downspout Positioning: If your deck roof has gutters, make sure downspouts direct water well away from footings.
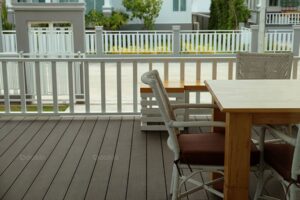
Deck Surface
Composite Decking
Color and Texture: Composite decking boards resist rot and splintering, but UV exposure can fade colors over years. Fading is cosmetic, not structural—though you may choose to replace severely discolored boards for appearance.
Surface Damage: Scratches and scuffs can often be buffed out with light sanding or repair kits sold by the board manufacturer.
Slip Resistance: Composite decks rely on molded grooves or anti-slip additives. Keep grooves clear of leaves and dirt to maintain traction.

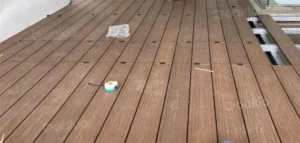
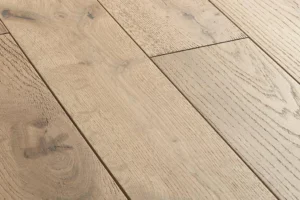
Wood Decking
Cracks and Splits: It’s normal for wood boards to crack slightly, but deep splits (more than 1/4 in.) weaken the board. Replace any board with splits running along the full length.
Rot Spots: Probing with a screwdriver can reveal soft, rotting areas. If you find rot, remove the board and any joist that’s been compromised.
Fastener Condition: Look for nail heads popping up. Replace exterior nails with exterior‑rated screws to hold boards firmly in place.
Finish Wear: Oil, stain, or sealant degrades over time. Bare wood turns gray and weathers faster. Plan on re-sealing every 1–3 years, depending on sun and moisture exposure.
Deck Stairs
Tread and Riser Security: Treads (horizontal steps) should be firmly attached without movement. Risers (vertical boards) must also be secure to prevent twisting.
Handrail and Guardrail: Handrails should be 34–38 inches above stair treads and able to resist at least 200 lbs. of force. Check rail posts for wobble; tighten or replace loose connectors.
Anti-Slip Measures: Stair nosing edges can be hazardous when wet. Consider installing anti‑slip treads or applying a non-slip coating.
Conclusion
A deck inspection doesn’t require a professional every time. With a few basic tools, you can walk through these five key areas in less than an hour. Catching loose fasteners, minor rot, or drainage issues early saves time and money—and keeps your deck ready for backyard barbecues, evening chats, and weekend lounging. Plan for a full check every spring and fall, plus a quick look after heavy storms. A little regular deck inspection goes a long way toward a safe, long-lasting deck.
Trending Reading
How to Screen in a Deck: A Complete Guide
A deck is one of the best spots to relax, host gat...
How to Choose the Right Deck Sizes for Your Home
A deck can transform your backyard into a true ext...
How to Calculate Deck Post Spacing for a Safe and Sturdy Deck
Whether you’re building a backyard retreat or upgr...

Breakdown of Composite Decking Types
Nowadays, composite decking has become the go- to ...
How Much Does a Deck Remodel Cost?
In recent years, more and more homeowners have cho...

Answering 9 Questions You Might Have about Building a Roof Deck
A roof deck is an outdoor platform built on a flat...
Solid Wood vs WPC: Which One Is the Best Wood For Decks?
When decorating a house, it is often hard to decid...

Cheap Deck Railing Ideas: Designs that Still Look Great without Breaking the Bank
A lot of modern homes use glass for deck railings ...

Deck Joist Spacing Guide: How to Get It Right for a Safe and Strong Deck
When building an outdoor deck, the joist structure...
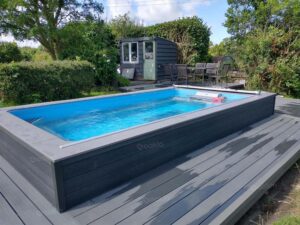
How to Build A Simple Above Ground Pool Deck
With the popularity of outdoor lifestyles, more an...
Trending Reading

What Are the Differences Between the WPC Board and PVC Board?
[2025 Update] How Long Does WPC Decking Last?


