How to Build a Floating Deck: A Step-by-Step Beginner’s Guide
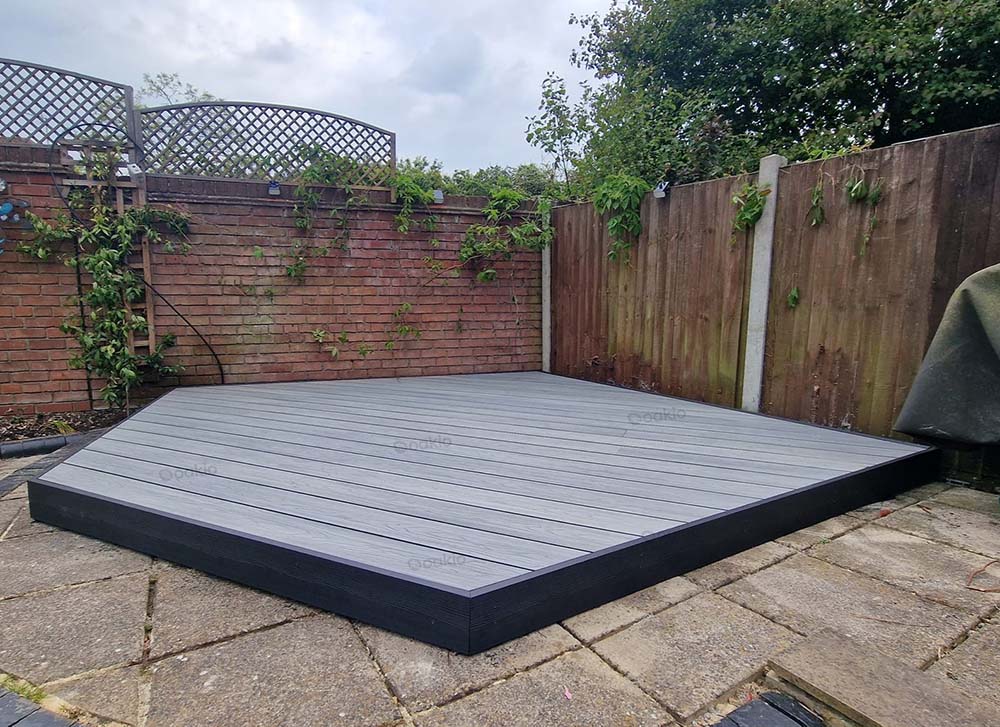
When it comes to creating a beautiful outdoor space without the hassle of complicated construction or permits, a floating deck is a perfect solution. Also known as a freestanding deck, a floating deck is not attached to your house and instead rests directly on the ground or slightly elevated. It’s a popular choice for DIYers due to its flexibility, affordability, and ease of installation. Whether you’re looking to create a cozy nook in the backyard or a stylish entertainment area, learning how to build a floating deck can transform your outdoor living experience.

Step 1: Plan and Design Your Floating Deck
The success of your floating deck starts with thorough planning. Begin by choosing the right location—preferably a level area that receives your desired amount of sunlight and provides good drainage. Think about how you’ll use the space: is it for dining, lounging, or both?
Next, decide on the dimensions and shape of the deck. A typical beginner-friendly size is around 10 x 10 feet. Sketch a rough layout and determine how many decking boards and support blocks you’ll need.
During this phase, consider materials and aesthetics. Will you use natural wood, pressure-treated lumber, or composite decking boards? If you haven’t decided on the material for your floating deck, try considering Oakio’s outdoor waterproof composite decking. Composite materials are more durable and require less maintenance, though they may have a higher upfront cost.
Lastly, check with your local authorities to verify whether permits or setback rules apply, even though most floating decks don’t require one.
Step 2: Gather Materials and Tools
Now that you have a design, it’s time to collect your supplies. Here’s what you’ll generally need:
Materials:
- Pressure-treated wood or composite decking boards
- Concrete deck blocks or pier blocks
- Joists (2×6 or 2×8, depending on your design)
- Galvanized screws or deck fasteners
- Landscaping fabric and gravel (optional, for ground prep)
Tools:
- Tape measure and carpenter’s pencil
- Power drill and circular saw
- Level and square
- Shovel and tamper (for ground leveling)
- Safety gear (gloves, safety glasses)
Choosing quality materials is key, especially for outdoor durability. Composite materials, while more expensive, resist rot, mold, and insects—ideal for long-lasting performance.
Step 3: Prepare the Ground
Preparation is vital to ensure your floating deck remains level and stable over time. Start by marking the deck area using stakes and string. Remove any grass or vegetation from the space using a shovel.
To prevent weed growth and enhance drainage, consider laying landscape fabric over the cleared area, then add a layer of gravel or crushed stone. This extra step will improve the longevity of your deck by minimizing moisture buildup underneath.
Use a tamper to compact the soil or gravel, creating a firm and even surface. This will serve as the foundation for your floating decking frame.
Step 4: Build the Floating Deck Frame
The floating decking frame is the skeleton of your deck. Begin by placing concrete deck blocks according to your plan. Typically, you’ll space them 4 to 6 feet apart, depending on the size of your joists.
Lay out the outer frame first using pressure-treated 2×6 or 2×8 boards. Secure the corners with galvanized screws. Once the perimeter is set, install interior joists at 16-inch intervals for proper support and stability.
Make sure everything is square and level before moving on. Use shims if necessary to adjust for uneven ground. This part may take time, but ensuring the frame is even will make the rest of the build much easier.
Step 5: Install Decking Boards
Once your frame is ready, it’s time to install the decking boards. Begin at one edge of the frame and lay boards perpendicular to the joists. Use spacers to maintain uniform gaps between boards (usually 1/8 to 1/4 inch) to allow for water drainage and expansion.
Secure each board with two screws per joist crossing. Take your time to align the boards neatly, especially if you’re using composite decking, which can show installation flaws more easily.
If needed, trim the overhanging ends using a circular saw for a clean, professional finish. Be sure to pre-drill holes in hardwood boards to avoid splitting.
Step 6: Add Finishing Touches
Now that the structure is complete, it’s time to add finishing touches. Sand any rough edges and inspect the deck for protruding screws or uneven boards.
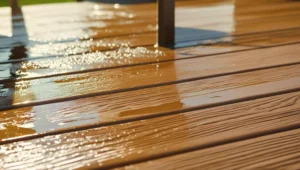
Depending on your material, you may want to apply a deck sealant or stain to protect against weathering—especially if you used untreated wood. Composite decks won’t need this step but can benefit from a light cleaning.
You can also consider adding optional elements like:
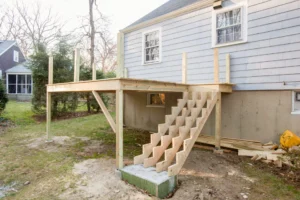
- Steps or small stairs for accessibility
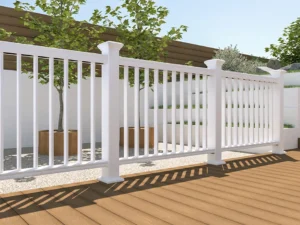
- Decorative railings for safety and aesthetics
- Built-in benches or planters for extra functionality
- Solar lights for nighttime ambiance
Final Thoughts
Congratulations! You’ve just built your very own floating deck. This DIY project not only adds value to your home but also provides a relaxing outdoor space for family and friends to gather. By following these steps and using the right materials, your deck will be both sturdy and stylish for years to come.
Whether it’s your first time tackling a construction project or you’re looking to upgrade your outdoor area, learning how to build a floating deck is an achievable and rewarding venture. So go ahead—grab a drink, lay out some lounge chairs, and start enjoying your new favorite spot right in your backyard.
Trending Reading
How to Layout a Stair Stringer: A Step-by-Step Guide
A solid stairway begins with precise planning, and...

Can You Drive A Screw Into Siding? Everything You Need to Know
If you’ve ever considered hanging a decoration, in...

How to Measure Fence Post Spacing: A Complete Guide
When planning a new fence, one of the most importa...
How to Build a Wood Deck Railing: A Step-by-Step Guide
A wood deck railing is more than just a safet...

What Cleans Composite Decking Best?
Composite decking are getting popular in outdoor p...

How to Keep Bugs Away from Your Patio
There’s nothing better than spending a sunny after...
How to Replace Deck Boards
Why do you need to replace your deck boards Deck b...

How to Build An Outdoor Wood Stair Railing
Outdoor wood stair railing is not only a functiona...
Winter Care Guide for Outdoor Decking: Simple Steps to Keep It in Top Shape
As autumn fades and winter sets in, we bundle up f...

How to Build a Hot Tub on Your Deck
Adding a hot tub on a deck is a great way to beaut...
Trending Reading

What Are the Differences Between the WPC Board and PVC Board?

[2025 Update] How Long Does WPC Decking Last?


