How to Build a Wood Deck Railing: A Step-by-Step Guide
A wood deck railing is more than just a safety feature—it’s the finishing touch that brings style, comfort, and security to your outdoor living space. Whether you’re building a brand-new deck or upgrading an old one, a properly installed railing ensures your deck is safe, functional, and visually appealing. Beyond aesthetics, railing systems are often required by building codes, especially for raised decks. In this guide, we’ll walk you through everything you need to know, from planning and tools to step-by-step construction, so you can build a railing that looks great and lasts for years.
Wood Deck Railing Requirements
Before you start cutting boards or driving screws, it’s important to understand the rules and requirements surrounding deck railings. Local building codes typically dictate the minimum railing height, baluster spacing, and post placement to ensure safety.
- – Height Requirements: Most codes require deck railings to be between 90–107 cm tall, depending on your region and the height of your deck.
- – Baluster Spacing: To prevent small children from squeezing through railing, balusters should generally be spaced no more than 10 cm apart.
- – Post Placement: Posts should be spaced at regular intervals—typically every 120–180 cm—to ensure stability.
Always check with your local building authority to make sure your wood deck railing not only looks attractive but also meets safety regulations.
Tools and Materials You’ll Need
Having the right tools and materials ready will make your project smoother and faster. Here’s a checklist to help you prepare:
Tools:
- – Power drill and driver bits
- – Circular saw or miter saw
- – Measuring tape
- – Carpenter’s level
- – Clamps
- – Safety gear (gloves, goggles)
Materials:
- – Pressure-treated lumber (for posts, rails, and balusters)
- – Galvanized or stainless-steel screws and fasteners
- – Wood adhesive (optional, for extra hold)
- – Decorative post caps (optional)
Pro tip: Choose high-quality wood such as cedar or redwood if you want a natural look with excellent resistance to decay and insects. Pressure-treated pine is a budget-friendly option that still performs well. If you are looking for high performance materials with durability and low maintenance, Oakio’s wood composite railing will be a great choice for its natural wood grain surface and strong composite core.
Planning Your Wood Deck Railing
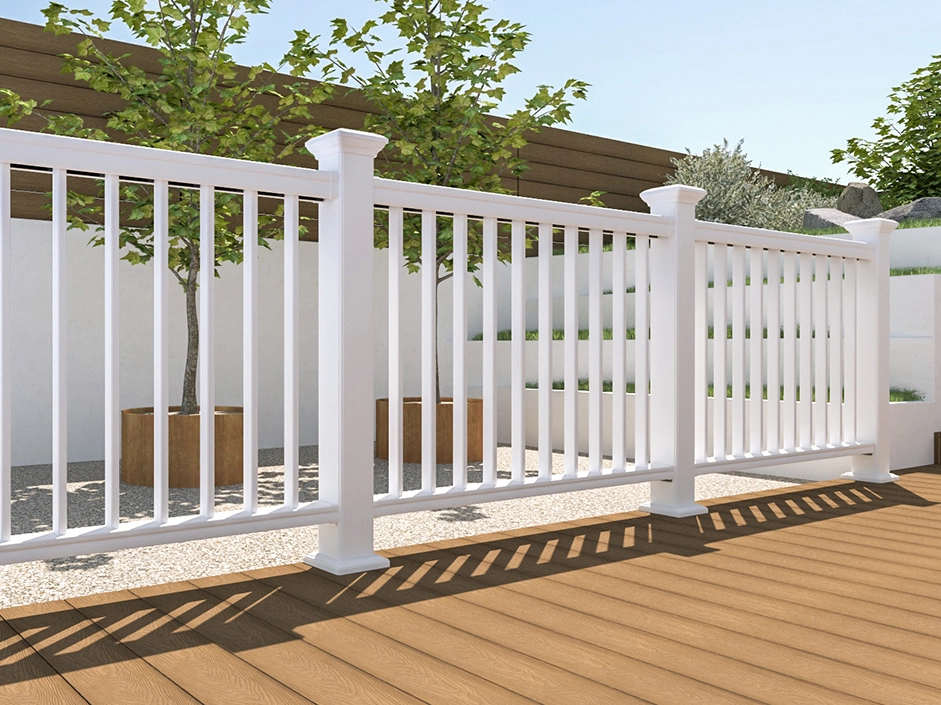
Planning is the foundation of a successful project. Start by carefully measuring the perimeter of your deck to calculate how many posts, rails, and balusters you’ll need. Decide on the style of railing that fits your home’s aesthetic:
- – Traditional vertical balusters for a timeless look.
- – Horizontal slats or cable railings for a sleek, modern design.
- – Cross-pattern or lattice for a more decorative touch.
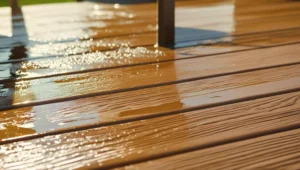
Keep in mind the environment, too—decks in humid or coastal areas benefit from rot-resistant woods and additional protective finishes. Oakio waterproof WPC decking is an ideal deck replacement material for wet areas for its surlyn outer layer.
Step-by-Step Guide to Building a Wood Deck Railing
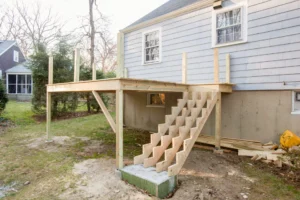
1. Install Railing Posts
Start by marking the spots where your posts will go. Posts are typically installed at corners, stairways, and every 120-180cm along the deck perimeter. Attach each post securely to the deck framing using carriage bolts or lag screws. The posts are the backbone of your wood deck railing, so take time to make sure they’re plumb and sturdy.
2. Attach Bottom and Top Rails
Measure and cut your bottom and top rails to fit between posts. Use a level to ensure they’re straight before fastening them in place. The bottom rail is usually installed a few inches above the deck surface to allow for water drainage and easier cleaning. The top rail should align with the height regulations set by your local code.
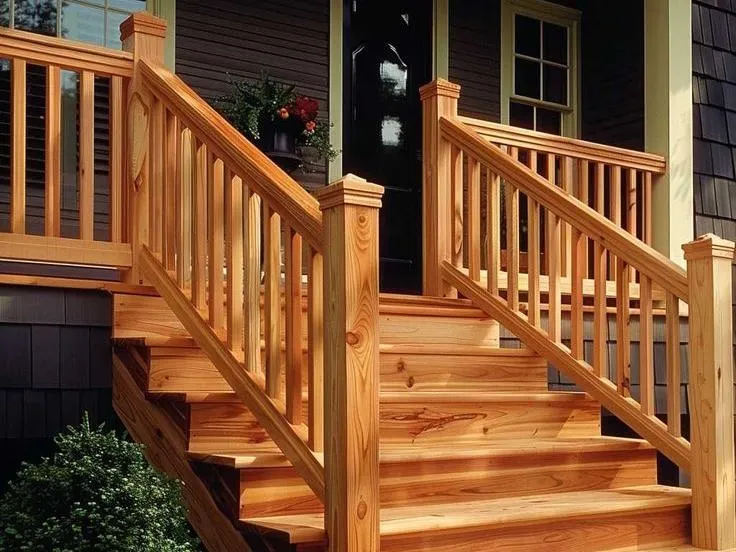
3. Add Balusters
Balusters are what give the railing its finished appearance while providing safety. Measure the spacing carefully so no gaps exceed 10cm. Use clamps to hold balusters in place before fastening them with screws. Consistency is key here—uneven spacing can make even a well-built railing look sloppy.
4. Secure the Top Cap
Once the balusters are in, add the top cap rail for both function and aesthetics. This wider piece of wood provides a smooth surface for resting drinks or leaning comfortably. Make sure the top cap is securely fastened and free of sharp edges.
5. Finishing Touches
With the structure complete, it’s time to refine your work:
- – Sand all rough edges to prevent splinters.
- – Apply a stain, sealant, or paint to protect the wood from moisture, sun damage, and pests.
- – Add decorative features such as post caps, lighting, or integrated planters to personalize your railing.
These final touches not only enhance the beauty of your wood deck railing but also extend its lifespan.
Things to Avoid When When Building a Wood Deck Railing
Even experienced DIYers make mistakes. Here are some common mistakes to avoid when building a wood deck railing:
- – Ignoring local codes: This can result in costly fines or even needing to rebuild.
- – Improper post spacing: Posts placed too far apart can cause the railing to wobble.
- – Using untreated wood: Skipping pressure-treated or naturally durable wood can lead to premature rot and decay.
Maintenance Tips for Long-Lasting Wood Deck Railing
A well-built wood deck railing will serve you for years, but only if you maintain it properly. Here are a few tips:
- – Clean regularly with mild soap and water to remove dirt and mildew.
- – Reseal or restain every 1–2 years, depending on climate and wear.
- – Inspect fasteners and wood for damage after harsh weather and replace as needed.
- – These small maintenance steps go a long way in preserving both safety and appearance.
Conclusion
Building a wood deck railing may seem like a big project, but with the right planning, tools, and attention to detail, it’s entirely achievable for most DIY enthusiasts. Not only will it make your deck safer, but it will also elevate its overall look and feel. By following these steps and avoiding common mistakes, you can create a railing that’s both sturdy and stylish. Start planning today, and soon you’ll have a deck that’s ready for family gatherings, summer parties, or simply a quiet evening outdoors.
Trending Reading
How to Layout a Stair Stringer: A Step-by-Step Guide
A solid stairway begins with precise planning, and...

Can You Drive A Screw Into Siding? Everything You Need to Know
If you’ve ever considered hanging a decoration, in...

How to Measure Fence Post Spacing: A Complete Guide
When planning a new fence, one of the most importa...

How to Build a Floating Deck: A Step-by-Step Beginner’s Guide
When it comes to creating a beautiful outdoor spac...

What Cleans Composite Decking Best?
Composite decking are getting popular in outdoor p...

How to Keep Bugs Away from Your Patio
There’s nothing better than spending a sunny after...
How to Replace Deck Boards
Why do you need to replace your deck boards Deck b...

How to Build An Outdoor Wood Stair Railing
Outdoor wood stair railing is not only a functiona...
Winter Care Guide for Outdoor Decking: Simple Steps to Keep It in Top Shape
As autumn fades and winter sets in, we bundle up f...

How to Build a Hot Tub on Your Deck
Adding a hot tub on a deck is a great way to beaut...
Trending Reading

What Are the Differences Between the WPC Board and PVC Board?
[2025 Update] How Long Does WPC Decking Last?


