What Is Deck Fascia and How To Install It
Have you ever wondered what a deck fascia is? It may sound like a very technical term only contractors know, but it plays an essential role in a deck’s installation process and is designed to make your deck more pleasing to the eyes.
A deck fascia is a board you run around the border of your deck to partially hide the joists (or the connection of decks) beneath your deck. Think about deck fascias as an aesthetic piece of your deck to make it more durable, pristine, and elegant.
In this article, we’ll answer your question in full detail and share steps and tips on installing one in your deck precisely and easily. Read on!
What Is A Deck Fascia?
A deck fascia is considered a finishing component or the final puzzle piece to complete a deck installation. They conceal the substructure and framework of a deck to present a pristine and composed aesthetics.
A deck fascia board is usually installed along the borders or perimeter of the decks to provide visual cover for the joists underneath the deck boards. To give you visual imagery, deck boards are usually installed vertically, and deck fascia boards are installed horizontally along the ends of the deck boards.
Fascia boards are installed with several benefits in mind: they dramatically improve the overall aesthetics of a deck by providing a seamless structure between the deck surface and the sublevels or the ground itself and protect the joists against dirt, rain, and insects.
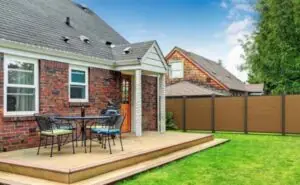
Deck Fascia View
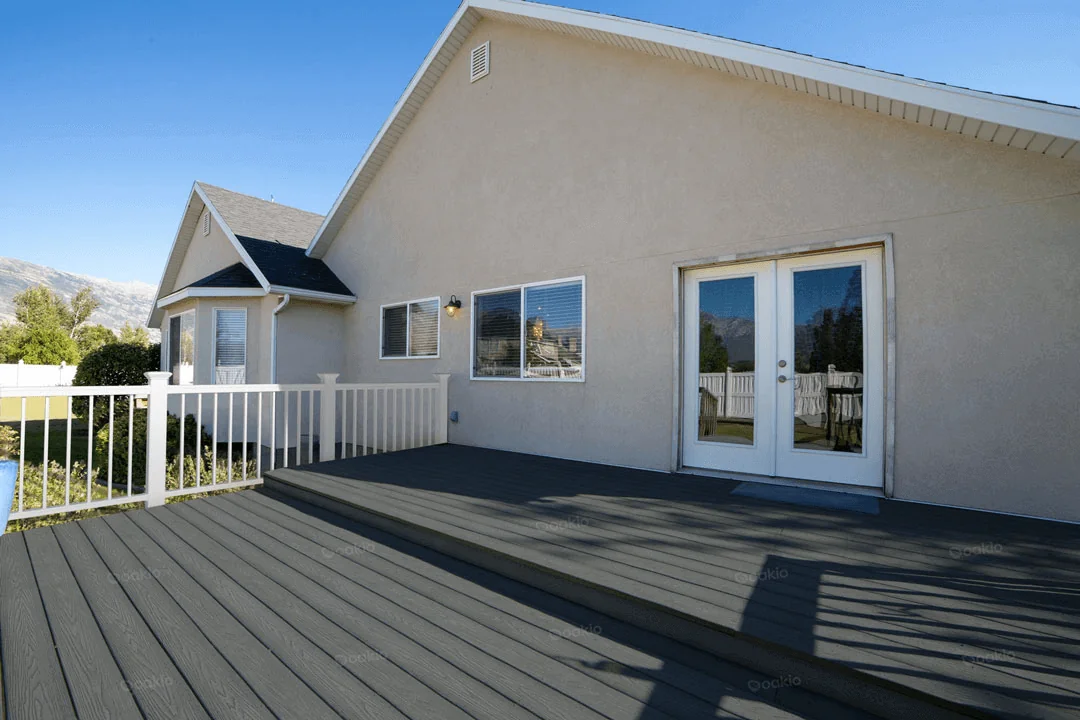
Here’s a view of a wooden deck with multi-layered fascias to cover the underneath structure of the deck:
Deck fascias can also be single, double, or triple—such as in the case of the image above. Multi-layered fascias have different board widths to accommodate this roof-sloping look. At times, fascias can also be used directly on the deck’s surface, creating the appearance of a picture-framed deck.
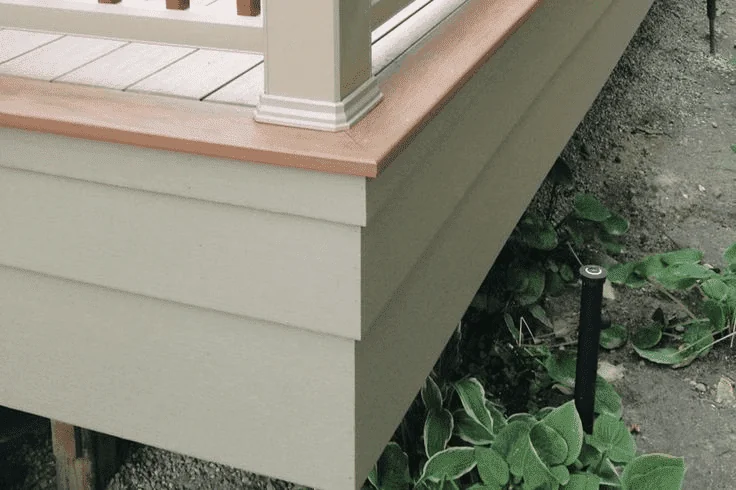
Fascia Boards on a Picture-Framed Deck
On the other hand, here’s what deck fascia boards on a picture-framed deck look like:
As pictured above, fascia boards installed on a picture-framed deck provide a sense of aesthetic elegance and glamor. They also offer protection and framed support for the deck to maintain its stability and durability for years.
Fascia boards are also customizable, though customization support depends on the type of material you’d like to use.
Can a Deck Fascia Serve a Functional Purpose?
Yes, deck fascias are known to be a functional component beyond their famous aesthetic-improving design. By function, a deck fascia primarily protects the substructure, composed of the joists and wood frame, from rain, mud, dirt, and even insects.
By providing a physical barrier for the edges of the deck, fascia boards redirect water to prevent it from penetrating the substructure—-which is the leading cause of rotting substructure. It also blocks soil and mud, which attracts pests and insects like ants and termites.
It also improves the deck’s structural integrity by reinforcing the edges with more thickness and stability.
What’s the Difference Between Fascia and Skirting?
Fascia and skirting are both used as finishing components and as such, they look and function almost the same. However, they have differences in overall function.
A deck fascia board is traditionally used for deckings to polish their edges, provide protection from elements and insects, and improve the deck’s appearance.
Skirting, in contrast, is used primarily as a construction component to provide protection and enclosure for building exteriors and interiors. Skirting is commonly oriented vertically in decks, walls, and other parts of your home. As such, you may see fascia and skirting in one place, though differing in function.
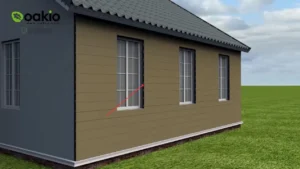
Before Installation
[Graphic of tools and materials needed in deck fascia installation]
Before you install a composite deck fascia for your composite deck, there are some things you need to know so you can seamlessly complete the installation:
Installation Duration
The duration of installation will vary depending on the design complexity and size dimensions of your deck, but on average, adding a deck fascia to your composite deck would take a few hours up to a full day (say eight hours).
If you need the project to be completed much quicker, we suggest getting an extra pair of hands to help you out.
Materials Needed
- Composite deck fascia boards that match the texture and color of your existing deck
- Composite deck fasteners, clips, and screws
- Construction-grade glue (optional for extra stability)
- Fascia board corner caps (if your boards don’t have one)
- Spacers
- Clamps
Tools Needed
- Tape measure (preferably the ones used in construction)
- Compact drill or drill driver
- Rubber mallet (avoid hammer as it can shatter the boards)
- PPE, personal protective equipment, such as safety gloves and goggles
- Circular saw or table saw
- Chalk line or laser-guided measuring tool
- Carpenter’s square
Step-by-Step Guide: How to Install Deck Fascia
In this section, we’ll teach you how to install a deck fascia with ten steps:
Step 1: Place Spacers
Begin by placing spacers between the deck and the fascia board. This step is important to facilitate proper water drainage and ventilation, preventing mold and mildew growth in the substructure, which is commonly made of simple, non-treated wood.
Step 2: Install Spacers
Once you secure the spacers and ensure they’re evenly spaced and aligned within the deck joists, use your compact drill and screws to attach the spacers to the deck structure. Keep in mind not to use screws that are too thick to prevent cracking the deck boards.
Step 3: Drill Hole in Spacers
Using your compact drill again, drill holes through the spacers in an even manner. Do this carefully, as those holes will guide the fasteners when it’s time to attach the deck fascia boards to the deck.
Step 4: Decide on Fastener Placement
Find the spacing and placement recommendations of the fasteners along the fascia boards and line them up along the spacers to ensure a seamless installation. Do note that the spacing might differ depending on the fascia type.
Step 5: Prepare Your Fastener Color and Plug
Now, it’s time to choose fasteners that match the color of your fascia boards to ensure a uniform appearance. And take note to get matching screw plugs if you’re using screwed fasteners; these plugs will conceal the screw heads to get a more cohesive look.
Step 6: Pre-Drill Fastener Holes
Get your compact drill and attach a drill bit smaller than the fasteners’ diameter. Pre-drill holes through the boards at the predetermined locations you did in Step 4. Doing this helps prevent cracking and splitting.
Step 7: Clamp Fascia
Place the deck fascia board along the edge of the deck, carefully positioning them in the place of the spacers and the holes. Once you position them, carefully clamp the fascia on the edge of the deck so you can work hands-free.
Step 8: Drill in the Fastener
With the boards clamped tight, begin drilling fasteners through the pre-drilled holes in the fascia board, which goes right through the spacers and into the deck substructure. Ensure the fasteners are flushed to ensure a flat fascia surface.
Step 9: Make Sure the Fascia is Intact
After you attach the fascia boards along the edges of your composite deck, do a final visual inspection to ensure all fasteners are secured and don’t wobble in any direction. You can also use a construction-grade adhesive to reinforce the fasteners’ connection.
Step 10: Plug the Holes
Once done, insert the screw plugs into the holes to perfectly conceal the screw heads and ensure a cohesive, premium-looking fascia. You can do this by tapping the screw plugs in place using a rubber mallet until they are flush with the surface of the fascia board.
If you follow these step-by-step instructions with surgical precision, we’re sure you’ll be able to install an aesthetic and functional deck fascia, which would make your deck look a lot better and more relaxing.
Enjoy A Polished Deck Fascia with Oakio!
A deck fascia is a component you install along the edges of your composite deck. Apart from its aesthetic purpose, it protects against the elements and improves your deck’s lifespan and overall durability.
You can also enjoy a more polished deck fascia by investing in composite deck fascias at Oakio! You can order a free composite board sample and get it on your doorstep! All these are possible at Oakio—a leading producer and innovator of composite wood products.
From wall cladding, railings, and pergolas to fencing and decking, we offer our state-of-the-art products so you can enjoy your outdoor space with elegance, durability, and cost-effectiveness in mind.
Subscribe to our newsletter to get the best deals and discounts we offer, and be the first person to read our expertly written guides like these!
Trending Reading

Deciphering the Simple Joist: Is Deck Joist Tape Necessary?
Outdoor decks are prized features in many homes, b...
Away From Prying Eyes: Privacy Fence Ideas for the Private Person
Creating a secure and stylish outdoor space is bec...
Joist Tape Explained: What It Is, Why You Need It, and How Much to Use
It is not easy to build a deck, which make it impo...

Insect Proof Wood Composite Flooring: Eco-Friendly Home Solution
Wood Plastic Composite (WPC) flooring is revo...
The Importance of Selecting the Right Additives for WPC Performance and Processing
WPC additives are crucial for enhancing both the i...
Creative Ways to Use Cladding Beyond the Walls
Your property’s cladding is one of the first featu...

How to Create a Multi-Level Deck: Design Ideas and Considerations
Adding a multi-level deck is a great way to take y...
Functional Trends in Foamed WPC Materials: A Path to Innovation
Foamed WPC (Wood-Plastic Composite) materials are ...
The Science Behind Wood Plastic Composites
What are WPCs? Wood plastic composites (WPCs) are ...

Choosing the Right Balcony Decking for Your Space
Constructing a balcony may be considered a luxurio...
Trending Reading
What Are the Differences Between the WPC Board and PVC Board?

[2025 Update] How Long Does WPC Decking Last?


